

Learn how to manage RV repairs with our step-by-step guide. From documentation to choosing professionals, ensure stress-free repairs!
TL;DR:
- Proper documentation and expert repair are crucial for efficient RV damage management.
- Regular inspections can prevent costly water intrusion and seal failure issues.
- Using certified RV technicians ensures safety and proper handling of complex repairs.
A sudden hailstorm in the Hill Country. A fender collision in a crowded campground. A mysterious water stain spreading across your ceiling. For Central Texas RV owners, these moments hit hard, especially when you’re not sure what to do next. The good news is that managing RV repairs doesn’t have to feel like a crisis. With the right preparation, a clear process, and the right professionals in your corner, you can move from damage to done without losing your mind or your savings.
Table of Contents
- What you need before starting RV repairs
- Step-by-step guide to managing RV repairs
- Troubleshooting and common RV repair mistakes
- Verifying repairs and protecting your RV long-term
- Our take: why proactive RV management in Central Texas matters more than you think
- Get expert RV repair help in Central Texas
- Frequently asked questions
Key Takeaways
| Point | Details |
|---|---|
| Document damage early | Take photos and notes immediately to support insurance claims and avoid disputes. |
| Choose certified expertise | Only trust RV-specific technicians for major repairs, especially collision or water damage. |
| Maintain proactively | Inspect your RV’s roof and seals twice yearly to prevent costly repairs. |
| Track all records | Keep copies of estimates, receipts, and communication for insurance purposes. |
What you need before starting RV repairs
With the problem clarified, the first step is making sure you’re fully prepared before any repair work begins. Rushing into repairs without the right documentation or information is one of the most expensive mistakes you can make.
Documentation is your foundation
If your damage involves an insurance claim, treat it like a structured project from day one. Thorough damage documentation includes photographing every angle of the damage, gathering any police or accident reports, and building an itemized list of what’s affected. This documentation becomes your leverage throughout the entire claims and repair process.
Use your RV maintenance checklist to cross-reference what systems may be affected and what parts are already due for attention. Good records save money.
Tools and materials to have on hand
Before any inspection, gather these basics:
- Digital camera or phone with high-resolution photos
- Notepad or digital notes app for recording damage details
- Flashlight for inspecting undercarriage and interior panels
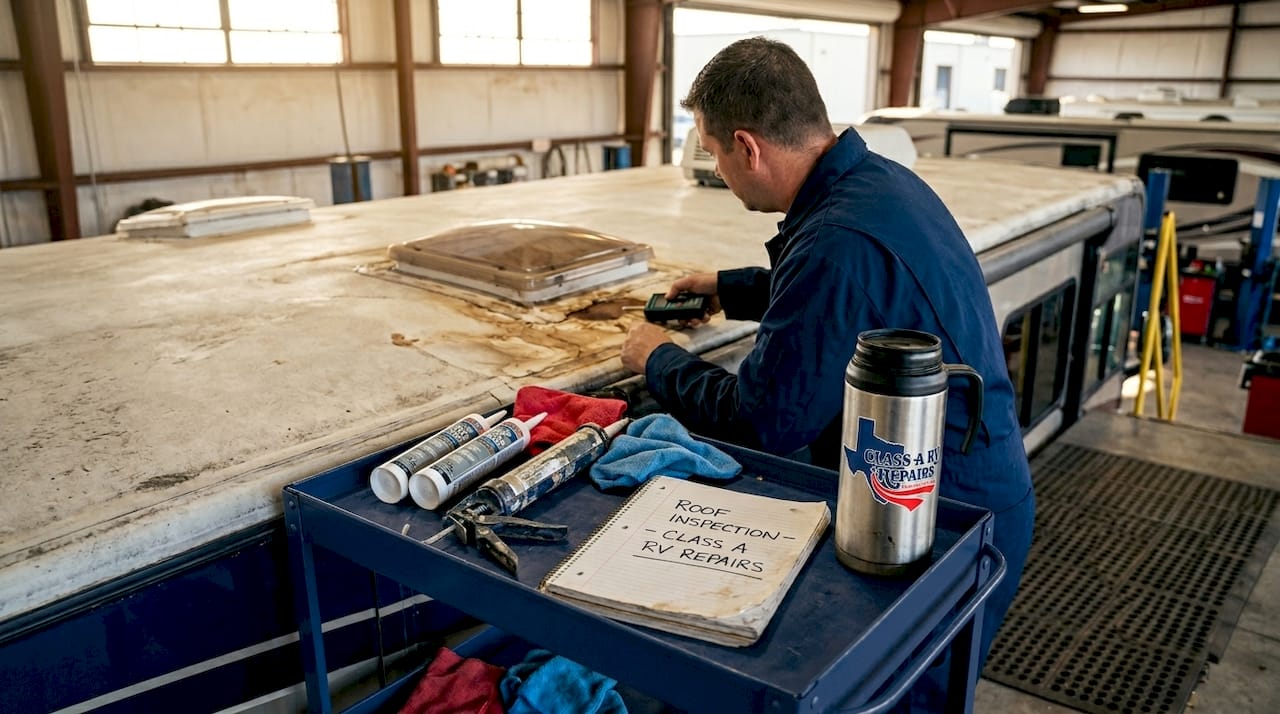
- Moisture meter (rented or borrowed) to check for hidden water damage
- Copy of your RV insurance policy and contact numbers
- Blank notebook to log every conversation with adjusters and repair shops
| Item | Purpose |
|---|---|
| High-res camera | Capture evidence for insurance |
| Moisture meter | Detect hidden water intrusion |
| Insurance documents | Speed up claims and approvals |
| Flashlight | Inspect tight spaces |
| Itemized damage list | Support accurate repair estimates |
DIY or professional repair?
Minor cosmetic work like a small scratch on a storage door might be manageable at home. But anything involving roof structure, slide-out systems, electrical wiring, plumbing, or collision damage requires a certified RV technician. These systems are not like standard home or car repairs. They require knowledge of how RV-specific materials and construction methods behave under stress.
Part of solid insurance claim preparation includes selecting the right shop. RVTI-certified technicians (those trained through the RV Technical Institute) have verified, hands-on expertise that standard auto body shops simply don’t have.
Pro Tip: Never take a complex RV repair to a standard auto body shop. They lack the training, equipment, and parts supply to handle RV-specific materials like fiberglass, aluminum framing, and multi-system integration.
Step-by-step guide to managing RV repairs
With your preparation complete, you’re ready to start managing the repair process step by step.
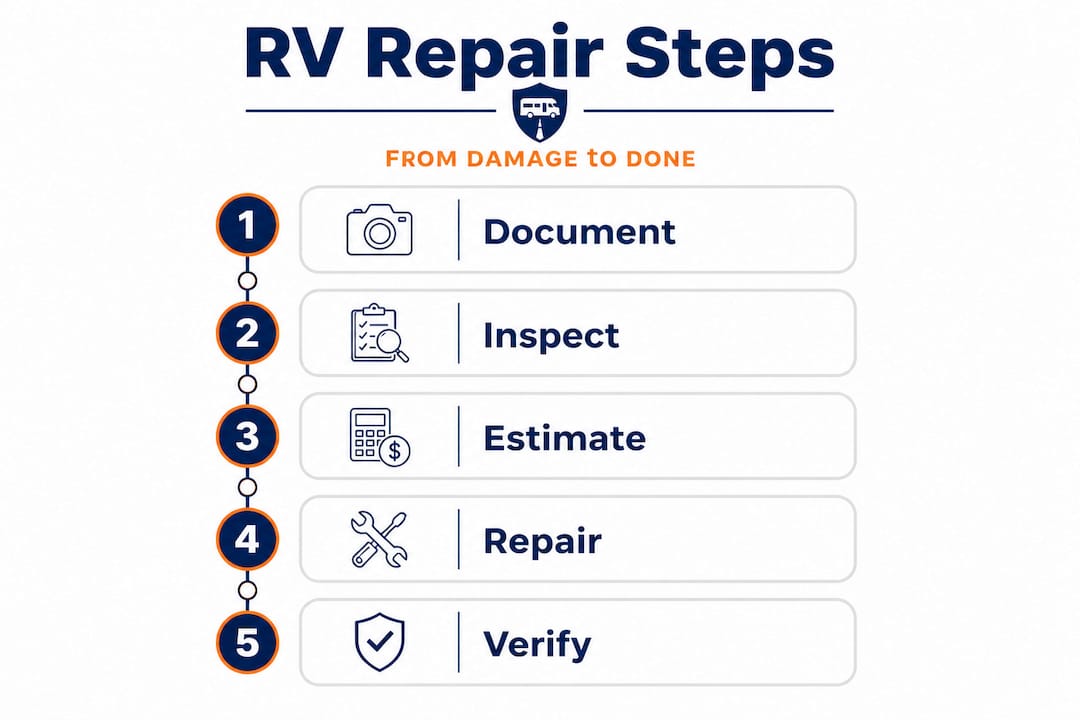
- Document all damage immediately after the incident. Take photos from multiple angles. Include wide shots and close-ups.
- File your FNOL (First Notice of Loss) with your insurance company. This creates your official claim number and starts the clock on their response timeline.
- Select a certified repair shop with RV-specific expertise. Ask about technician certifications, facility size, and whether they handle insurance billing directly.
- Get itemized estimates in writing. Vague estimates lead to disputes. An itemized list protects you if supplemental damage is found mid-repair.
- Track the repair timeline by maintaining written communication with the shop. Email is better than phone for creating a paper trail.
- Request a final walkthrough before paying or leaving the shop to confirm all agreed repairs are complete.
The five-phase insurance claim structure described by RV repair experts covers document collection, FNOL, facility selection, estimate negotiation, and supplemental claims. Each phase matters. Skipping one can delay your repair or reduce your payout.
| Repair scenario | DIY appropriate? | Professional required? |
|---|---|---|
| Minor exterior scratch | Yes | No |
| Hail damage across roof | No | Yes |
| Slide-out motor failure | No | Yes |
| Small seal gap on storage door | Possibly | Recommended |
| Electrical system issue | No | Yes |
| Interior cabinet damage | Sometimes | Recommended |
For RV collision repair steps specifically, professional oversight is almost always necessary. Collision events affect structural integrity in ways that aren’t visible from the outside.
Pro Tip: Always request a fully itemized estimate before approving any work. If hidden damage appears mid-repair, this document becomes your basis for a supplemental insurance claim.
When hidden damage surfaces during repairs (which happens often with RV collision or hail work), file a supplemental claim promptly. Don’t wait. Your shop should flag this immediately, and your insurer needs written documentation to approve additional coverage.
If you’re ready to move forward, scheduling RV service early prevents backlog delays, especially after major weather events when shops fill up fast.
Troubleshooting and common RV repair mistakes
Understanding common pitfalls can save you significant time and money during your repair journey.
Central Texas RV owners deal with a specific combination of hazards: intense summer heat, sudden hailstorms, and dramatic weather shifts between seasons. Each one takes a toll on RV materials and systems.
The most frequent repair mistakes we see include:
- Ignoring early signs of water intrusion, like soft spots on the floor or faint staining near windows
- Choosing the cheapest estimate without verifying the shop’s RV credentials
- Failing to document damage thoroughly before an adjuster or shop sees the vehicle
- Delaying repairs after hail events, which allows UV exposure and moisture to compound damage rapidly
- Not following up on supplemental claims when hidden damage is found
“Water intrusion is one of the most expensive RV repairs Central Texas owners face. Catching it early through regular seal and roof inspections can save thousands of dollars.”
That warning is not an exaggeration. Roof and seal inspections should happen at least twice a year, checking every vent, skylight, AC unit, and roof penetration. In Central Texas, we’d recommend doing this before summer and again before fall travel season.
Signs that a completed repair wasn’t done correctly include new soft spots near the repair area, misaligned body panels, visible gaps in sealant, or systems that don’t function as they should. If something feels off after pickup, speak up immediately. A reputable shop will address it.
Your RV preventative maintenance routine is your best defense against these expensive surprises.
Verifying repairs and protecting your RV long-term
Once repairs are complete, take time to verify the work and plan for long-term RV health.
Post-repair verification checklist
- Review all receipts and work orders line by line against the original estimate
- Visually inspect every repaired area in daylight, including roof seams and panel edges
- Test all affected systems including electrical, plumbing, slide-outs, and leveling jacks
- Check new sealant application for gaps or bubbling that indicate improper application
- Run interior appliances to confirm no disruption from repair work
Long-term maintenance best practices
- Inspect roof seals and penetrations twice yearly at minimum
- Store your RV covered or in a facility when not in use to reduce UV and hail exposure
- Clean exterior surfaces regularly to spot new damage or seal failures early
- Keep a dedicated folder, physical or digital, with all repair records, photos, and warranty documents
- Schedule professional inspections before and after each major travel season
Organized documentation makes every future insurance claim or resale transaction smoother. Buyers and adjusters both respond better to RV owners who have complete records. For ongoing guidance, our travel trailer maintenance tips cover the specific care your rig needs in this region.
Our take: why proactive RV management in Central Texas matters more than you think
The most common pattern we see from RV owners who end up with expensive, complicated repairs is not bad luck. It’s delayed action. A small roof crack that could have been sealed for under $50 becomes a $4,000 structural repair when it’s ignored through two Texas summers.
Central Texas roads and weather are genuinely hard on recreational vehicles. Caliche roads in the Hill Country rattle seams and stress joints. Summer heat causes sealants to expand and crack faster than in milder climates. Hail seasons arrive without much warning. This isn’t the Pacific Northwest, where a slow season lets damage wait. Here, the next weather event is always right around the corner.
We’ve also watched owners lose thousands in insurance disputes because they didn’t document damage promptly or chose a shop without RV credentials. A standard auto body shop might look capable, but when their technicians start cutting into RV sidewalls without knowing how aluminum cage framing works, the damage gets worse before it gets better.
Your RV insurance strategy should include knowing your shop before you need one. Vetting a certified RV repair facility when you’re calm and not in crisis mode leads to far better outcomes than searching frantically after a hailstorm.
Proactive management isn’t just smart in this region. It’s what separates owners who enjoy their RVs for decades from those who end up selling a damaged rig at a loss.
Get expert RV repair help in Central Texas
If you’re dealing with collision damage, hail impact, or just want a professional set of eyes on your RV before the next trip, Class A RV Repairs is built specifically for this work.

Our purpose-built facility handles everything from minor paint touch-ups to full structural repairs, and we work directly with insurance companies to simplify the claims process for you. Explore our full RV repair services to see what we cover, compare options through our paint repair solutions guide, or get a realistic sense of costs with our RV repair costs overview. We also offer on-site camping while your rig is in service, so you never have to scramble for a place to stay.
Frequently asked questions
How do I know if I should repair my RV myself or hire a professional?
If the damage involves structural components, electrical or plumbing, or requires insurance approval, always use a certified RV technician. DIY repairs on complex systems can void warranties and complicate claims.
What is the first thing to do after discovering RV damage?
Immediately document the scene with photos and notes, then contact your insurer to file a claim. Filing FNOL promptly starts your claim number and protects your timeline.
How often should I inspect my RV for leaks or seal failures?
Inspect roof and seals at least twice a year to prevent costly water intrusion repairs, especially in Central Texas where heat and UV exposure accelerate sealant breakdown.
What documentation should I keep for insurance-driven RV repairs?
Keep all photos, receipts, itemized estimates, and communication records throughout the claim and repair process. Complete documentation is the single most important factor in a successful insurance outcome.
Recommended
- RV bodywork repair tutorial: DIY steps for lasting results
- Essential RV parts replacement guide: Central Texas owners
- Keep Your RV Running Longer: Preventative Maintenance Guide
- RV Emergency Repair Checklist: Essential Steps for Quick Fixes
- 7 parasta vinkkiä renkaiden huollon parhaisiin käytäntöihin
Jean runs growth strategy at AimSetWin, a performance marketing agency specializing in local service businesses across Texas. he's helped plumbers, HVAC companies, pest control operators, and home service brands build predictable revenue systems using data-driven advertising and conversion optimization.


