

Navigate your RV claims smoothly with our essential insurance adjuster RV checklist. Ensure you gather the right documentation and avoid costly mistakes!
TL;DR:
- Proper documentation and understanding adjuster criteria are essential to maximize RV insurance claim payouts after storm damage.
- Organized photos, detailed incident reports, and independent repair estimates help prevent claim denials and hidden damage issues.
A violent hailstorm rolls through the Texas Hill Country, and the next morning you walk outside to find your motorhome or travel trailer dimpled from nose to tail. Your stomach drops. Now what? Filing an RV insurance claim sounds straightforward until you realize that insurance adjusters have a very specific process, and one missed step can stall your payout or even get your claim denied. This checklist walks you through exactly what adjusters need to see, what documentation you must gather, and how to protect yourself from costly surprises along the way.
Table of Contents
- What insurance adjusters look for in RV claims
- Your complete RV adjuster checklist: Step-by-step
- Best practices for photo evidence and supporting documentation
- Dealing with hidden damage, supplements, and common claim pitfalls
- The uncomfortable truth about RV insurance claims in Central Texas
- Get expert help with your RV claim and repairs
- Frequently asked questions
Key Takeaways
| Point | Details |
|---|---|
| Know adjuster criteria | Familiarize yourself with damage patterns and supporting evidence adjusters seek for RV hail and collision claims. |
| Document thoroughly | Collect wide and close-up photos, keep receipts, and track all details to strengthen your insurance claim. |
| Prepare for hidden issues | Be ready to request supplements if additional damage is uncovered during repairs or teardown. |
| Leverage independent assessment | Bring in a repair specialist for an unbiased evaluation; their documentation can support disputes and maximize payout. |
What insurance adjusters look for in RV claims
Once you understand why a generic claim leads to frustration, it’s crucial to know exactly what your insurance adjuster will be looking for during the inspection.
Adjusters are trained to verify that damage is storm-related, recent, and consistent with the reported event. For hail claims specifically, adjusters evaluate hail damage using four primary criteria: a random pattern of strikes, recent indicators like granule loss and mat exposure, size correlation with the reported hailstones, and consistency across roof slopes and soft metals. If your damage does not check all four boxes, expect pushback.
For RV hail damage repair cases specifically, soft metals are your best friend. Gutters, AC condenser fins, and vent covers dent easily and hold the shape of hail strikes with impressive precision. These areas serve as independent corroboration that a storm actually hit, which makes them critical pieces of your overall evidence picture.
Collision claims work a bit differently. Adjusters in those situations focus on structural integrity, frame alignment, and moisture intrusion rather than pattern consistency. You can learn more about how collision repair basics intersect with insurance expectations before your adjuster shows up.
| Damage type | Primary adjuster focus | Key corroborating evidence |
|---|---|---|
| Hail | Random pattern, size match, recent granule loss | Soft metals, splatter marks, weather reports |
| Collision | Frame/structure, moisture, impact point | Photos, police report, repair assessment |
| Wind | Lifted panels, torn seals, punctures | Perimeter caulking, vent covers, debris marks |
Understanding these distinctions helps you tailor your documentation strategy rather than collecting random photos and hoping for the best.
Your complete RV adjuster checklist: Step-by-step
Now that you know what adjusters are looking for, here’s a detailed checklist that will keep your claim process on track.
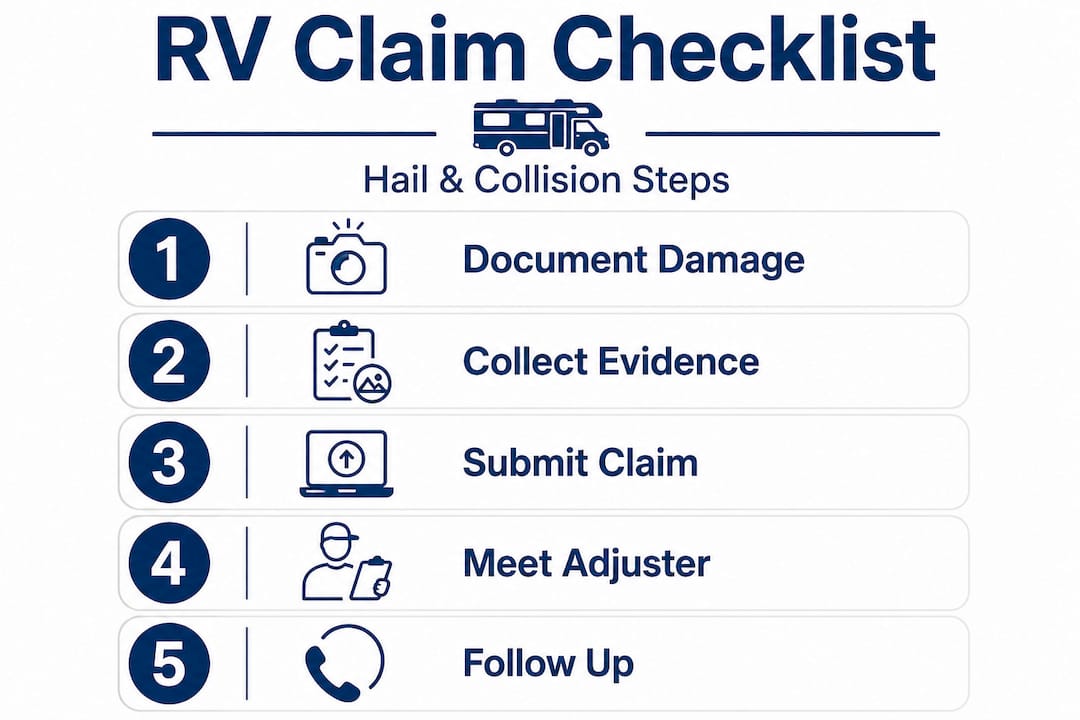
For RV claims, you should provide the adjuster with your VIN, year, make, and model, a written incident summary, storage location, wide shots of the overall condition, close-ups of all damage including cracks, dents, punctures, and water entry points, interior photos if the damage extends inside, and model plate information to help source parts. Having all of this ready before the adjuster arrives shows you are organized and serious, which genuinely speeds up the process.
Here is the step-by-step checklist you should follow:
- Secure the RV immediately. Move it to a covered location if possible, but do not start any repairs.
- Pull your VIN and registration. Have both the physical plate and a digital photo saved somewhere accessible.
- Write a detailed incident summary. Date, time, location, what you heard or saw, and how you discovered the damage.
- Download your weather report. Use the National Weather Service or a weather app that shows historical storm data for your exact ZIP code.
- Photograph the entire exterior. Start with wide shots of each side, then move to close-ups of every impact or damage point.
- Document interior damage. Water stains, warped paneling, wet flooring, and damaged cabinetry all count.
- Photograph soft metal surfaces separately. AC fins, gutters, and vent covers deserve their own image set.
- Collect model plates and part numbers. Adjusters need these to estimate parts costs accurately.
- Request an independent shop assessment. Having a written estimate from a repair facility strengthens your position.
- Organize everything before the adjuster arrives. Label files, date-stamp photos, and keep originals untouched.
Pro Tip: Use a free spreadsheet or a photo management app to tag each image with the location on the RV (for example, “roof front left slope” or “driver-side gutter”). This makes the adjuster’s job easier and reduces the chance that key damage gets overlooked. More guidance on preparing your RV for inspection is available if you want to go deeper before your appointment.
Best practices for photo evidence and supporting documentation
A checklist is only as good as the documentation behind it. Here’s how to collect bulletproof evidence for your insurance adjuster.
Document hail damage with wide-angle photos per roof slope, close-ups of at least 10 hail strikes showing granule loss, soft metal damage on gutters and AC fins, and corroborating evidence like vehicle dents or splatter marks. Ten close-ups is a minimum, not a target. If you have 40 clearly documented strikes, use all 40.
Follow a grid-based tagging system. Label your photos using compass direction and sequence, for example NW-1 through NW-12 for the northwest roof slope. This approach means you can point to a specific image in your documentation file and say, “This is strike number seven on the northwest slope, showing mat exposure and a sharp edge consistent with recent impact.” That level of specificity is hard for an adjuster to dismiss.
Here are additional documentation best practices:
- Pull official weather event records from the National Weather Service storm database for Central Texas storms.
- Get a written assessment from a certified RV repair technician before or alongside the adjuster visit.
- Do not tarp or patch the roof before inspection unless water is actively entering the living space. If you must protect against water intrusion, photograph everything before covering it.
- Cross-reference your damage photos with the storm report’s reported hail diameter.
- Save all text messages, emails, and voicemails with your insurance company from the moment you report the claim.
“Prioritize thorough photo documentation addressing adjuster criteria to avoid denials; use independent shop assessments alongside your insurer for complete records, especially in hail-prone Central Texas.” Hail Damage Documentation Guide
Solid documentation also protects you if the claim is disputed months later. Files with clear timestamps and location tags make it nearly impossible to argue that damage appeared after the fact. Check out these insurance claim repair tips to understand how a repair shop can reinforce your evidence package.
Dealing with hidden damage, supplements, and common claim pitfalls
Even the best inspection may miss some damage. Here’s how to protect your claim if new issues turn up after the adjuster leaves.
In-person inspections are common for structural, roof, or slide-out damage, while desk adjusters handle photo reviews remotely. When a repair shop tears down a section and finds hidden structural compromise or moisture infiltration not visible during the initial walkthrough, a supplement is required. Supplements are formal requests to reopen and expand the claim, and they are more common than most owners realize.
Supplements are common on roughly 40% of wind and hail claims, and hail microfractures in roofing materials often do not become visible until weeks after a storm. Insurers may also deny claims citing pre-existing wear, cosmetic-only damage limits, or concurrent causation, meaning they argue the damage came from multiple events rather than the one you reported.
Here is how to handle post-inspection discoveries:
- Notify your insurance company in writing immediately when new damage is found.
- Request a written supplement estimate from your repair shop before authorizing additional work.
- Document hidden damage with photos at the moment of discovery, before repairs begin.
- Reference the original claim number in all supplement correspondence.
- Escalate to a supervisor or file a formal dispute if your supplement is denied without a clear explanation.
Pro Tip: Ask your repair shop to specifically look for microfractures in roof membranes and moisture readings in wall cavities during their initial teardown. These are the most frequently missed items, and catching them early saves you from a second fight with your insurer later. If hidden structural damage surfaces, finding a qualified body shop early in the process gives you a knowledgeable advocate. For warranty-related complications that overlap with collision damage, claim warranty issues can intersect with your standard insurance process in ways worth understanding.
The uncomfortable truth about RV insurance claims in Central Texas
Here is what most guides will not tell you directly: your insurance adjuster works for the insurance company, not for you. That is not a cynical view, it is just the reality of the business structure. Adjusters are under genuine pressure to keep payouts within certain ranges, and when damage is ambiguous, the interpretation that saves money tends to win.
This does not mean adjusters are dishonest. Most are doing their job professionally. But “professional” in their world means following the insurer’s standards, not advocating for your maximum payout. The gap between what you deserve and what gets approved often comes down to documentation quality, not actual damage severity.
Owners who show up with a disorganized phone photo album and a verbal description of the storm are leaving money on the table. Owners who bring a labeled photo file, a weather report, an independent repair estimate, and a written incident summary walk in with a position that is genuinely difficult to dispute. The DIY repair perspective also matters here: attempting any fixes before documentation is complete can eliminate coverage for those areas entirely.
In Central Texas, where hail seasons are serious and storm cells can produce baseball-sized hailstones, the difference between thorough and casual documentation can be thousands of dollars. Treat your claim like a legal case, because sometimes it becomes one.
Get expert help with your RV claim and repairs
If you want real peace of mind during your RV claim process, working with Central Texas specialists makes all the difference. At Class A RV Repairs, we work directly with insurance companies and understand exactly what adjusters need to approve a complete, fair settlement.

Our team provides written repair assessments that are formatted to support your claim, handles supplement requests when hidden damage surfaces, and keeps you informed at every step. Whether you need full-service RV repair, specific insurance claim repairs, or just want to understand what RV repair costs look like before you commit, we are here to help Central Texas RV owners protect their investment and get back on the road faster.
Frequently asked questions
What information should I prepare before my RV adjuster visit?
Have your VIN, year, make, model, a detailed incident summary, storage location, and photos of overall and damaged areas ready for the adjuster. Organized documentation speeds up the inspection and reduces back-and-forth.
What photos are most persuasive for RV hail or collision claims?
Wide shots per slope, close-ups of at least 10 hail strikes with granule loss, and soft metal damage help prove new, storm-related damage rather than pre-existing wear.
How can I tell if my hail damage is recent enough to be covered?
Adjusters look for recent damage indicators like sharp edges, loose granules, and a random pattern that matches the storm’s reported hail size and direction.
What if hidden damage is found after my insurance settlement?
Request a supplement immediately. Supplements for hidden damage found during teardown are a standard part of the RV claims process and insurers commonly issue them when properly documented.
Can I start DIY repairs before my adjuster visit?
Unless you must act to prevent further water damage, do not start any repairs until your adjuster inspects and fully documents all existing damage.
Recommended
- RV Hail Damage Repair: Restore and Protect Your RV
- RV warranty and collision repair: What Texas owners must know
- How to prepare your RV for an insurance claim: step-by-step
- RV fiberglass repair in Texas: protect your investment
Jean runs growth strategy at AimSetWin, a performance marketing agency specializing in local service businesses across Texas. he's helped plumbers, HVAC companies, pest control operators, and home service brands build predictable revenue systems using data-driven advertising and conversion optimization.


